

As a child, Blackbutt Reserve always felt like a magical place. I remember visiting with my parents and walking down from the old car park off Lookout Road. While it looks very different today, the beautiful transformation of Richley Reserve and its nature-inspired playground has made it an even more

You’ll be able to taste your social media feed as the Viral Food Festival returns to Newcastle! Get ready to taste the internet’s most viral creations, from trending sweet treats to over-the-top savoury bites. Back for its second visit, this flavour-packed festival brings together the internet’s most talked-about foods for
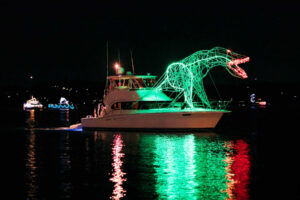
It’s almost time to return to the shores of Lake Mac for ‘Float Your Boat’ 2026! Watch a dazzling parade of brightly lit vessels glide across Lake Macquarie, a truly unmissable event for families. Enjoy a colourful display of illuminated boats, plus fun activities onshore. This year, the celebrations take